Domain Routing With Amazon S3 and Route53
In addition to being a great static webhost, Amazon S3 can be used as a cheap way to blindly redirect domain names. I needed to use this method recently so I thought I’d document the process for future reference.
For one of my current projects, we chose a company name which was an intentional misspelling of a common phrase — Full Monte IOL being a play on the phrase “Full Monty” combined with “Markov Chain Monte Carlo”, a statistical algorithm we use in our product.
Given this intentional misspelling, we decided to snatch up a few alternate domains to catch users who end up typing in the wrong url:
fullmonteiol.com
fullmontyiol.com
fullmonteiols.com
fullmontyiols.com
We want to set each of these domain names (and their www subdomains) to redirect to fullmonteiol.com.
Normally this is pretty trivial. We’d direct all of these domains to the server where we host the canonical domain and we simply include the following in .htaccess (or an equivalent non-apache config):
RewriteEngine On

RewriteCond %{HTTP_HOST} !^fullmonteiol\.com$
RewriteRule ^(.*)$ http://fullmonteiol.com/$1 [R=301,L]
However, we recently decided to move our domain name to a static web host (using Jekyll & GitHub Pages). While GitHub Pages is cheap and highly scalable, we’re no longer able to configure url redirects or point multiple domains to the same website; GitHub Pages handles www.* domain redirects, but the rest is up to us.
We could just run an EC2 instance for the sole purpose of handling redirects, but that’s overkill. Amazon actually provides a much simpler solution with S3 and Route53. Here’s how to do it:
1) Setup S3 Buckets
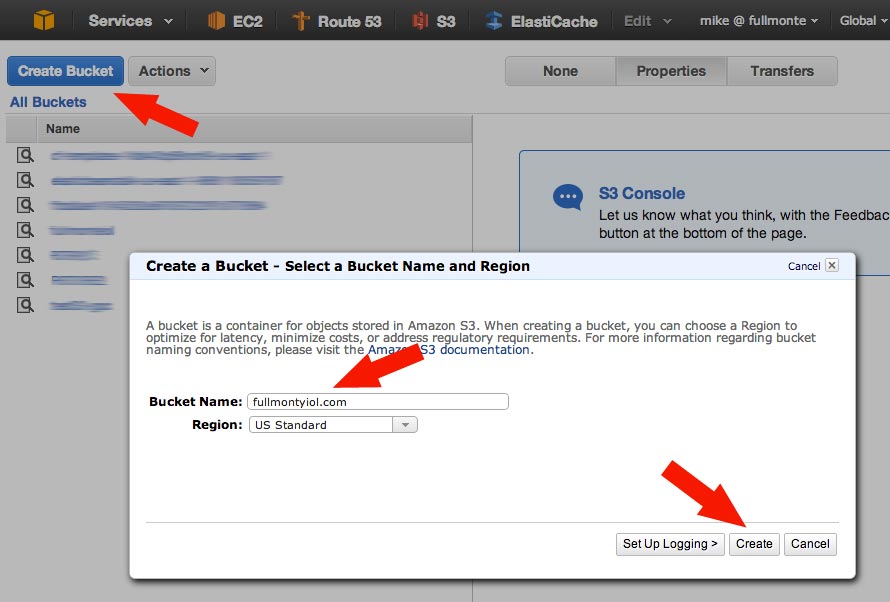
Create an S3 bucket for the domain name you wish to redirect:
Once you’ve created it, select “Properties” then under “Static Web Hosting” check “Redirect all requests to another host name”. Fill the target domain in the box and click “Save”. Make a note of the “Endpoint” url:
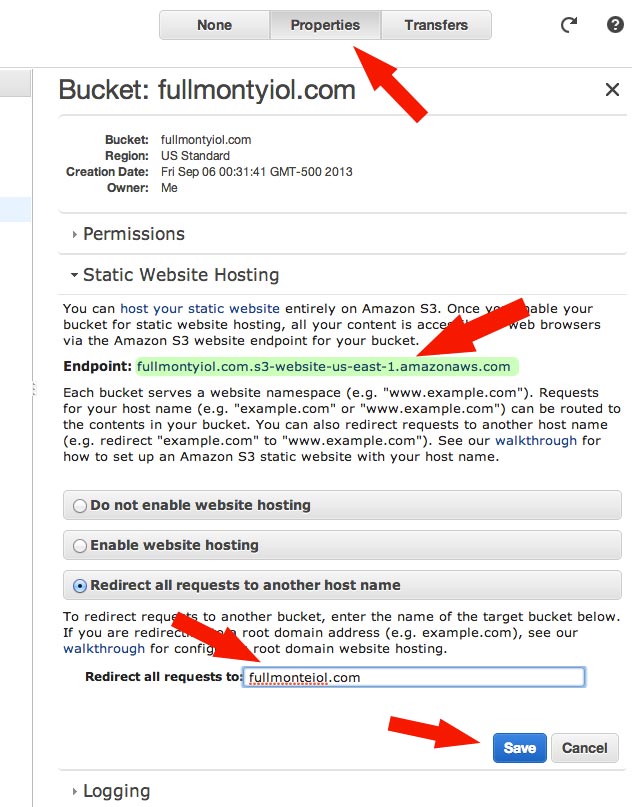
Follow the same process for the “www” subdomain.
2) Configure Route53
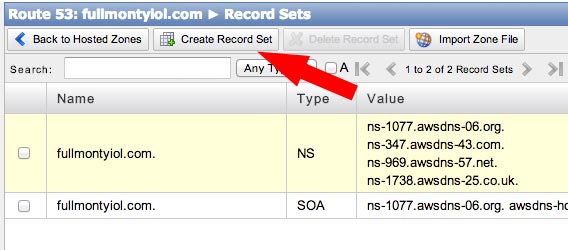
Within Route53 create a DNS zone for your domain name if one does not already exist, then click “Create Record Set”.
For the primary domain we have to use an A record, however Route53 lets you mimic the behavior of a CNAME record through the use of an “Alias”. To do this, simply select “Yes” under Alias then click on the Alias Target text box. You should see your S3 bucket listed as an option in the dropdown menu. Select it and click “Create Record Set” to save the record.
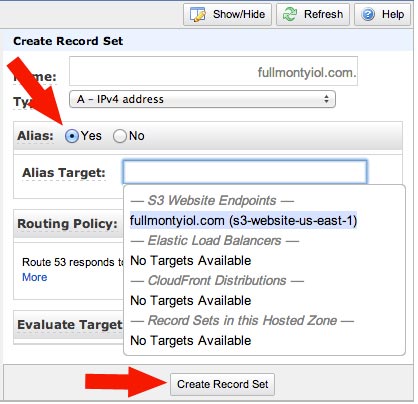
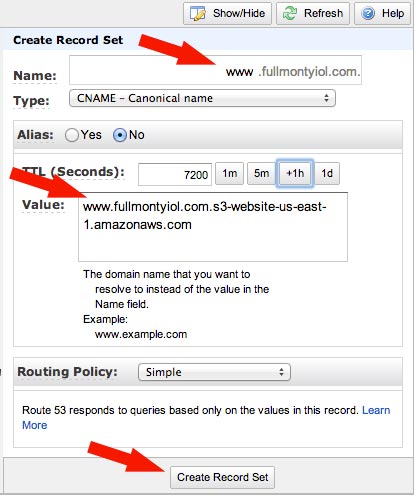
For any subdomains (such as ‘www’) you must create a CNAME record. Fill in the subdomain name and select “CNAME” under Type. For the value, use the “Endpoint” url for the subdomain’s S3 bucket which we noted in step 1.
And you’re done. Just make sure your domain registrar is set up to point to Route53’s nameservers and your domains will soon be redirecting all requests to the host you specify.
