Backing Up a Google Calendar to S3
This blog post will be a quickie. A client of mine recently asked me to start making regular backups for their business-critical scheduling data (which is currently hosted in a shared google calendar), so I decided to automate the process. This afforded me the opportunity to explore the aws cli tool, iam roles for compute cloud instances, and other fun stuff so I thought I’d pass it all along.
Installing AWS CLI Tools
For this project I decided to write a simple shell script which downloads the calendar data and stores the backups on Amazon S3. To accomplish this we first need to install the handy dandy aws command on the machine that will be performing the backups. Install pip if it is not already available, then use it to install awscli.
$ sudo pip install awscli
Granting Access to Your S3 Bucket from EC2
Now, before we can use the aws command to do anything useful, we need to ensure it has access to our S3 bucket. There are several ways to provide your access credentials through environment variables or config files, but if – like me – you are planning on running this backup script on elastic compute cloud, you can simply grant access to the EC2 instance directly and the aws command will magically configure itself.
Note: If you aren’t planning to use EC2, and you already have an access key pair set up for your S3 bucket, you can skip this section…
How does that work? Well, EC2 allows you to assign IAM “roles” to your EC2 instances when you first start them up. These roles are essentially the same as your IAM user credentials, but they are attached to the EC2 instance and discovered automatically through your instance meta-data.
Defining a role is pretty simple. Just go to the IAM section in your AWS management console and click on “Roles” in the left-hand column. Now click “Create New Role” at the top.

Each EC2 instance can only have one role, but each role may have multiple policies. In my case I have a long-running t1.micro instance that I use for many random tasks like this, so I generically named mine “misc-utility”. Enter a name and go to the next step.

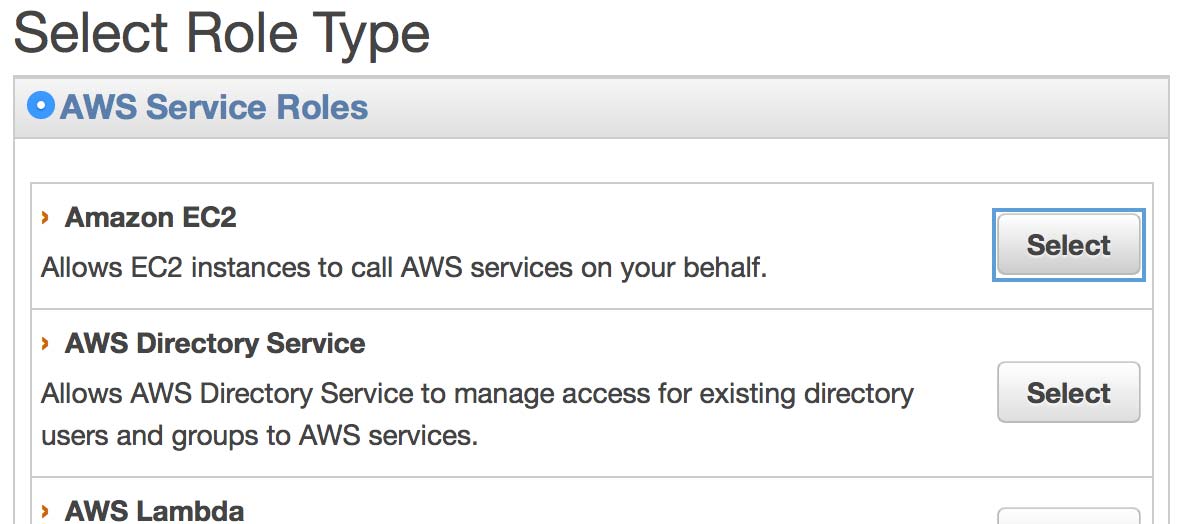
Select the “Amazon EC2” service role as your role type and go to the next step.

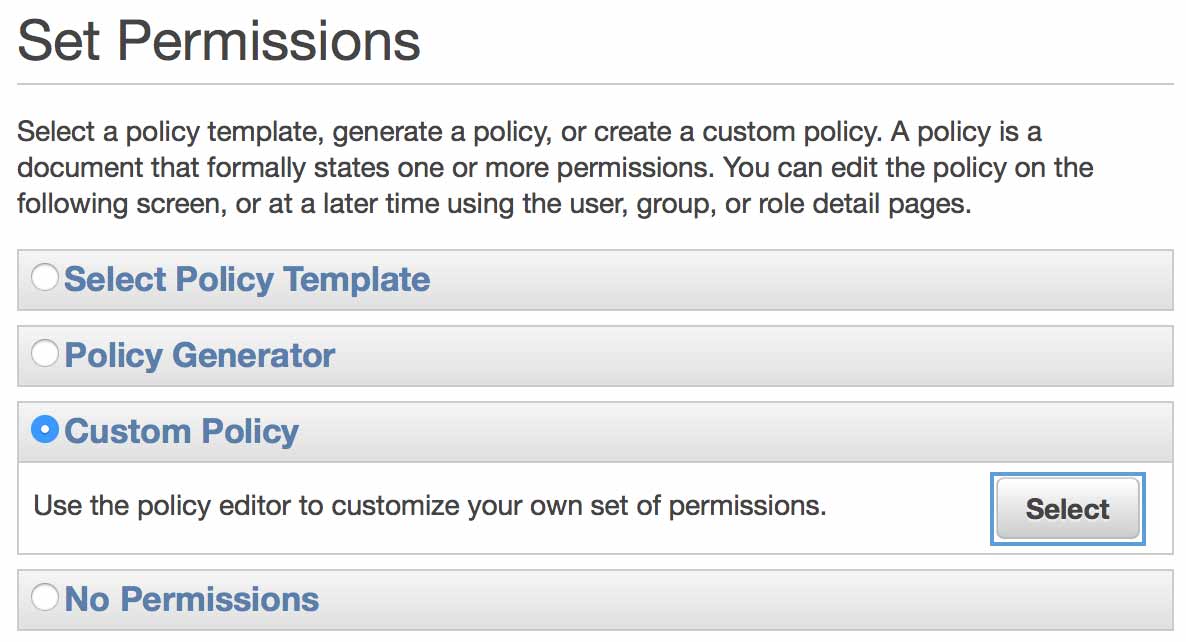
The policy generator will work here, but we’re in a rush! Just select “Custom Policy” for our role permissions, then use the following as the policy document:
{
  "Version": "2012-10-17",
  "Statement": [
    {
      "Effect": "Allow",
      "Action": [
        "s3:DeleteObject",
        "s3:GetObject",
        "s3:PutObject"
      ],
      "Resource": [
        "arn:aws:s3:::my-bucket-name/*"
      ]
    }
  ]
}
Make sure to replace the bit where it says my-bucket-name with your actual s3 bucket name, and name the policy something descriptive like “grant xxx s3 bucket access”. This policy should be pretty self-explanatory. It will allow you to upload, download, and delete files within the named bucket. If you wanted to grant access to all s3 buckets, just omit the my-bucket-name part and use "arn:aws:s3:::*" as the resource. Or, if you wanted to limit access to uploading files only, you could omit the "s3:DeleteObject" and "s3:GetObject" lines.
Now, we need to assign this IAM role to an EC2 instance. Go to the EC2 section of the AWS management console and create a new instance. When you get to the step “Configure Instance Details”, select the IAM role we just created.

Note: Annoyingly, there is no way to assign an IAM role to an already running (or even “stopped”) EC2 instance, so if you have an existing instance to which you want to assign this role, you’ll need to save it, terminate it, and recreate it.
Now, we can jump into our ec2 instance and the aws command will just work like magic!
$ echo "Hello World!" > foo.txt
$ aws s3 cp foo.txt s3://my-bucket-name/
Locating Our Calendar
Next, we need to locate the private url for our calendar. Head to calendar.google.com and go to your settings. Click on the calendar you wish to backup, scroll down to the “Private Address” for your calendar and copy the ICAL link.

The Backup Script
Now let’s create a shell script to backup our calendar:
#!/bin/sh
export TZ=America/Chicago
export PATH=/usr/local/bin:$PATH
bucket="my-bucket-name"
gcal_private_key="mydomain.com_b6ndfgum9v5an4z7v4bdhoyll4%40group.calendar.google.com/private-83bb3c4777e5c347c37d438579b573a0"

cd $(mktemp -d 2>/dev/null || mktemp -d -t 'backup')
mkdir backup

curl https://www.google.com/calendar/feeds/$gcal_private_key/basic > backup/master-cal-backup.xml
curl https://www.google.com/calendar/ical/$gcal_private_key/basic.ics > backup/master-cal-backup.ics

tar -zcvf backup.tgz backup
aws s3 cp backup.tgz s3://$bucket/calendar-backup/$(date +%Y%m%d-%H%M).tgz
- Change the
bucketvariable to match your s3 bucket name, and fill in thegcal_private_keyvariable using the link we copied in the last step (just slice out all the random characters in between/calendar/ical/and/basic.icsand use it as your key). - The
export TZ=America/Chicagoline is just so our date function, used to generate the backup filename, uses my current time zone. Modify it to your liking. - The
export PATH=line is necessary because ourawscommand is usually installed at/usr/local/binwhich is not included in cron’s default PATH. You can double check your own aws installation by typingwhich awsand ensuring that its path is included.
For now, we can just throw this in our current directory. Let’s call it backup.sh.
$ nano backup.sh
$ chmod +x backup.sh
$ ./backup.sh
If all is well you should see some lines spit out by curl and aws. Check your s3 bucket to ensure the file was transfered successfully.
Note: if you aren’t running on EC2, you will need to supply an AWS key pair here before the
awscommand will work. You can do this by adding the following lines near the beginning of the script:
export AWS_ACCESS_KEY_ID=ABCDEFGHIJKLMNOPQRST
export AWS_SECRET_ACCESS_KEY=1234567890ABCDEFGHIJKLMNOPQRSTUV
Automating the Script with Cron
First, let’s move our script someplace where we can easily reference it:
$ mkdir -p ~/.cron
$ mv backup.sh ~/.cron/
Now, we need to add our script to crontab. Run the following command:
$ crontab -e
Add the following line:
0 */2 * * * ~/.cron/backup.sh > /dev/null 2>&1
This will schedule our backup script to run once every two hours.
Note: If you want to check that it works without waiting for two hours, change
0 */2to* *and it will run every minute. If it doesn’t appear to be working, try directing the output someplace else by changing/dev/nullto/tmp/gcal-backup.logand then checking its contents.
Conclusion
There ya have it… really, this script could automate backing up just about anything to s3, not just google calendar data. Among the possible improvements might be a means to check for and remove old backups after a certain date. I’d also be curious to see if AWS’s recently launched Lambda service could perform the same function without requiring a dedicated server at all.
Soon I’m going to tackle the task of parsing these calendar files and sending out daily digests of events to company employees. I suspect I will be employing Amazon SES or Mandrill for the task. Stay tuned.
